Spring Boot Admin實現服務健康預警功能
Over View
上一篇文章主要介紹了Spring Boot Admin的概況以及我們如何在系統中引入和使用Spring Boot Admin,以此來幫助我們更加了解自己的系統,做到能快速發現、排查問題。本篇文章將用代碼演示Spring Boot Admin的消息通知功能,并利用這個開箱即用的特性來個性化我們的需求,優化我們在服務治理方面的工作效率。
Spring Boot Admin內置了多種開箱即用的系統通知渠道,包括郵件、Slack、Telegram、Hipchat等多種社交媒體的通知渠道。但是考慮到它所支持的大都是一些國外的主流社交媒體,在國內的本地化可能并不是那么的友好。不過沒關系Spring Boot Admin也提供了通用的接口,使得用戶可以基于他所提供的接口來自定義通知方式。下面使用Spring Boot Admin的通知功能來實現基于郵件和國內辦公軟件“飛書”的服務健康預警。
郵件預警
依賴引入
在Spring Boot Admin的服務端項目中引入郵件相關依賴
<dependency> <groupId>org.springframework.boot</groupId> <artifactId>spring-boot-starter-mail</artifactId></dependency>
添加配置
添加Spring Mail相關配置,我們配置好我們郵箱的Smtp服務器相關信息
spring.mail.host=your email smtp serverspring.mail.password=your passwordspring.mail.port=your email smtp server portspring.mail.test-connection=truespring.mail.username=837718548@qq.com
添加Spring Boot Admin(SBA)中相關的郵件配置,以下是SBA官方提供的郵件相關參數
Property name Description Default value spring.boot.admin.notify.mail.enabled Enable mail notifications true spring.boot.admin.notify.mail.ignore-changes Comma-delimited list of status changes to be ignored. Format: '<from-status>:<to-status>'. Wildcards allowed. 'UNKNOWN:UP' spring.boot.admin.notify.mail.template Resource path to the Thymeleaf template used for rendering. 'classpath:/META-INF/spring-boot-admin-server/mail/status-changed.html' spring.boot.admin.notify.mail.to Comma-delimited list of mail recipients 'root@localhost' spring.boot.admin.notify.mail.cc Comma-delimited list of carbon-copy recipients spring.boot.admin.notify.mail.from Mail sender 'Spring Boot Admin <noreply@localhost>' spring.boot.admin.notify.mail.additional-properties Additional properties which can be accessed from the template
我們這里使用如下配置
spring.boot.admin.notify.mail.from=837718548@qq.comspring.boot.admin.notify.mail.ignore-changes=''spring.boot.admin.notify.mail.to=目標郵箱
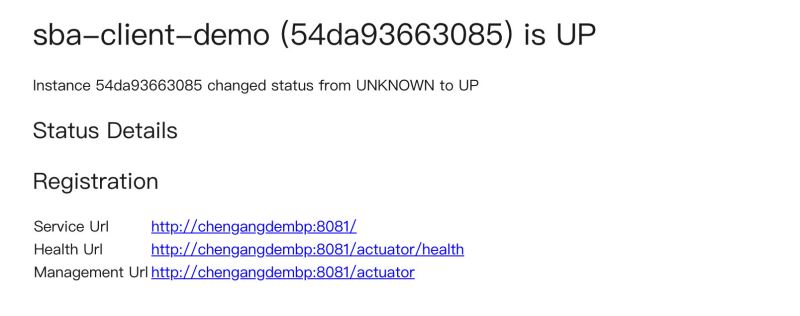
配置中的ignore-changes參數表示服務從一個狀態變成其他狀態時發出預警,例如:'UNKNOWN:UP' 表示服務從未知狀態變成UP時,發出通知。當其值是''時,表示任何狀態變更都會發出預警。若想指定其他參數,參考上面的參數表。完成上述操作后,重啟Spring Boot Admin服務端,當客戶端服務注冊進來并且狀態變為UP時,我們可以收到一封郵件:
添加郵件模版
Spring Boot admin發送的郵件可以自定義模板樣式,我們使用thymeleaf語法編寫郵件模板,示例模板代碼可參考本文在Github的代碼示例倉庫,編寫完模板文件之后,將文件放入項目src/main/resources/templates中,并且在配置文件中增加指定模板文件的地址:
spring.boot.admin.notify.mail.template=classpath:/templates/status-changed.html
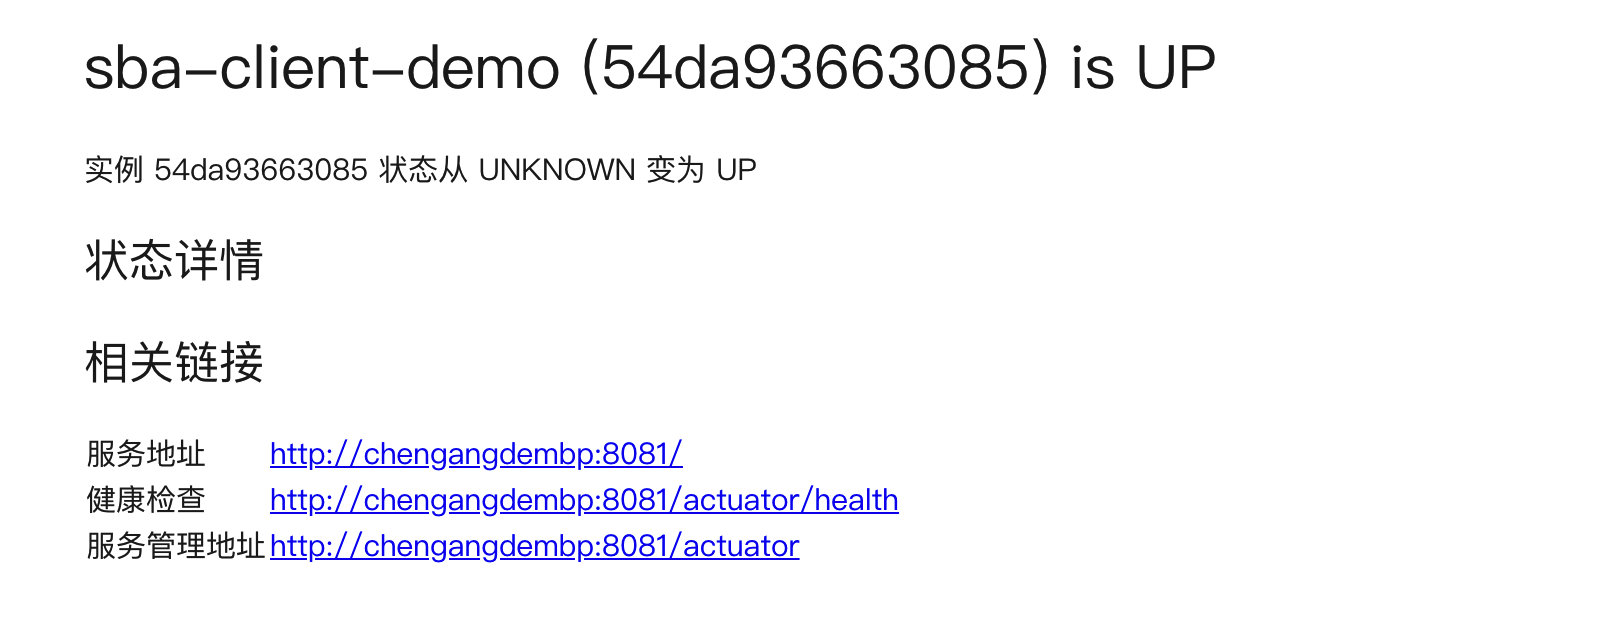
重啟Spring Boot Admin服務端,當客戶端服務注冊進來并且狀態變為UP時,我們可以收到一封郵件,如下是我們對郵件進行本地化之后的樣式:
飛書預警
由于Spring Boot Admin內置的通知渠道都是國外的社交媒體,不過它也提供了自定義通知渠道的接口,所以我們很容易就可以自定義通知渠道,下面演示集成辦公軟件飛書的通知。
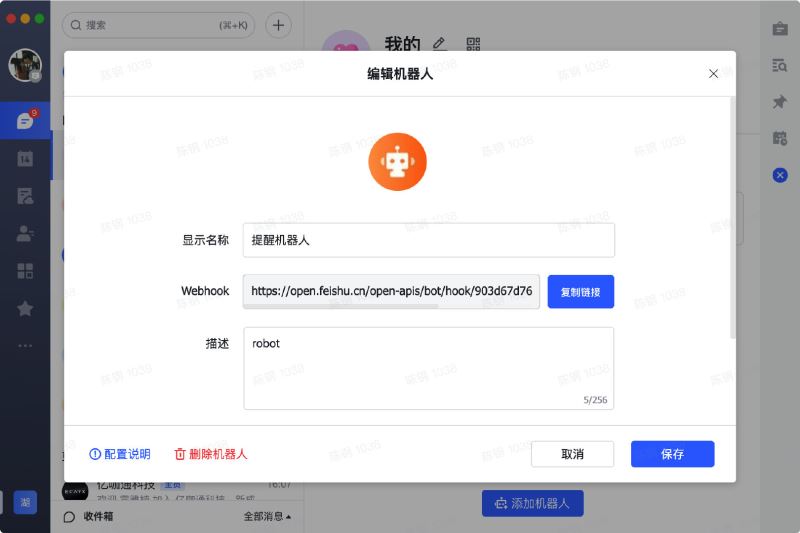
獲取通知地址
飛書中提供了聊天機器人,我們只需調用機器人的WebHook就可以實現詳細的推送(企業微信,釘釘也具有類似功能)。
自定義通知渠道
Spring Boot Admin中提供了一個AbstractStatusChangeNotifier抽象類,我們可以通過繼承它來自定義通知渠道
public class FlyBookNotifier extends AbstractStatusChangeNotifier { private static final String DEFAULT_MESSAGE = '#{instance.registration.name} (#{instance.id}) 狀態發生轉變 #{lastStatus} ➡️ #{instance.statusInfo.status} ' + 'n' + 'n 實例詳情:#{instanceEndpoint}'; private final SpelExpressionParser parser = new SpelExpressionParser(); private RestTemplate restTemplate; private URI webhookUrl; private Expression message; public FlyBookNotifier(InstanceRepository repository, RestTemplate restTemplate) { super(repository); this.restTemplate = restTemplate; this.message = parser.parseExpression(DEFAULT_MESSAGE, ParserContext.TEMPLATE_EXPRESSION); } @Override protected Mono<Void> doNotify( InstanceEvent event, Instance instance) { if (webhookUrl == null) { return Mono.error(new IllegalStateException('’webhookUrl’ must not be null.')); } return Mono .fromRunnable(() -> restTemplate.postForEntity(webhookUrl, createMessage(event, instance), Void.class)); } public void setRestTemplate(RestTemplate restTemplate) { this.restTemplate = restTemplate; } protected Object createMessage(InstanceEvent event, Instance instance) { Map<String, Object> messageJson = new HashMap<>(); messageJson.put('title', '👹警告&👼提醒'); messageJson.put('text', getText(event, instance)); HttpHeaders headers = new HttpHeaders(); headers.setContentType(MediaType.APPLICATION_JSON); return new HttpEntity<>(messageJson, headers); } protected String getText(InstanceEvent event, Instance instance) { Map<String, Object> root = new HashMap<>(); root.put('event', event); root.put('instance', instance); root.put('instanceEndpoint', instance.getEndpoints().toString()); root.put('lastStatus', getLastStatus(event.getInstance())); StandardEvaluationContext context = new StandardEvaluationContext(root); context.addPropertyAccessor(new MapAccessor()); return message.getValue(context, String.class); } public URI getWebhookUrl() { return webhookUrl; } public void setWebhookUrl(URI webhookUrl) { this.webhookUrl = webhookUrl; } public String getMessage() { return message.getExpressionString(); } public void setMessage(String message) { this.message = parser.parseExpression(message, ParserContext.TEMPLATE_EXPRESSION); }}
上面代碼是一個示例,用戶可以根據自己的需求來自定義消息體的格式和內容。隨后我們在Spring中創建該通知類的bean
@Configurationpublic static class NotifierConfiguration { @Bean @ConditionalOnMissingBean @ConfigurationProperties('spring.boot.admin.notify.flybook') public FlyBookNotifier flyBookNotifier(InstanceRepository repository) { return new FlyBookNotifier(repository, new RestTemplate()); }}
最后我們在項目的配置文件中添加我們飛書渠道的配置信息
spring.boot.admin.notify.flybook.ignore-changes=''spring.boot.admin.notify.flybook.webhook-url=https://open.feishu.cn/open-apis/bot/hook...
完成上述操作后,重啟Spring Boot Admin服務端,當客戶端服務注冊進來并且狀態變為UP時,我們可以在飛書端收到Spring Boot Admin自動推過來的預警信息:

至此,我們的自定義消息渠道就已經完成。通過繼承AbstractStatusChangeNotifier抽象類,我們可以很輕易的自定義自己想要實現的推送渠道(設計模式:模板方法模式)。
總結
本文主要介紹了Spring Boot Admin中所提供的多種消息預警推送渠道,并且我們可以通過自定義消息預警渠道來滿足我們自身的需求,整個過程并不需要耗費太多的人力和時間成本。我們用了兩個示例來演示如何實現Spring Boot Admin的消息預警功能,分別是郵件預警和自定義的飛書預警。
本文的示例代碼SBA-client:https://github.com/cg837718548/sba-client-demo.gitSBA-server:https://github.com/cg837718548/sba-server-demo.git
到此這篇關于Spring Boot Admin實現服務健康預警功能的文章就介紹到這了,更多相關spring boot 健康預警內容請搜索好吧啦網以前的文章或繼續瀏覽下面的相關文章希望大家以后多多支持好吧啦網!
相關文章:
 網公網安備
網公網安備