Spring:bean注入--Set方法注入
1.新建一個空的 maven項目。
2.導入依賴
properties><project.build.sourceEncoding>UTF-8</project.build.sourceEncoding><!--這里是java 版本號--><maven.compiler.source>11</maven.compiler.source> <maven.compiler.target>11</maven.compiler.target><!--這里是方便版本控制--><spring.version>5.3.1</spring.version><lombok.version>1.18.20</lombok.version><junit.version>4.12</junit.version></properties><dependencies> <dependency><groupId>org.springframework</groupId><artifactId>spring-beans</artifactId><version>${spring.version}</version> </dependency> <dependency><groupId>org.springframework</groupId><artifactId>spring-context</artifactId><version>${spring.version}</version> </dependency> <dependency><groupId>org.projectlombok</groupId><artifactId>lombok</artifactId><version>${lombok.version}</version> </dependency> <dependency><groupId>junit</groupId><artifactId>junit</artifactId><version>${junit.version}</version> </dependency></dependencies>
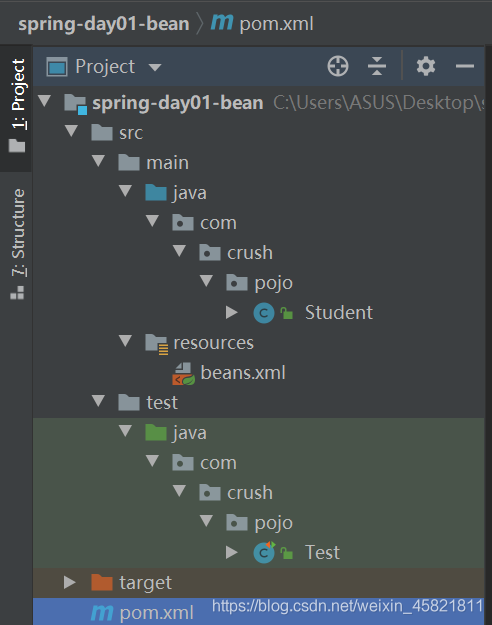
3.工程項目結構
4.新建包 com.crush.pojo
5.新建Java類Student
@Data // set、get 方法@AllArgsConstructor // 全參構造@NoArgsConstructor // 無參構造public class Student { /** * 學號 */ private Long number; /** * 學生姓名 */ private String name; /** * 所在學校 */ private String school;}
resource 下 beans.xml文件
<?xml version='1.0' encoding='UTF-8'?><beans xmlns='http://www.springframework.org/schema/beans' xmlns:xsi='http://www.w3.org/2001/XMLSchema-instance' xsi:schemaLocation='http://www.springframework.org/schema/beans http://www.springframework.org/schema/beans/spring-beans.xsd'> <!--第一種方式 set 方式注入1、有set方法才可以注入2、默認是單例模式 singleton--> <bean scope='singleton'><!--值可以跟在在標簽后面 也可以 寫在標簽內部--><property name='number'> <value>1</value></property><property name='name' value='wyh'/><property name='school' value='hngy'/> </bean><!--這個id 就是 applicationContext.getBean('【bean-id】', Student.class);此處id 大多數時候命名規則就是 類名的第一個字母改為小寫class:Studentbean id一般就為: student --> <bean scope='singleton'><!--值可以跟在在標簽后面 也可以 寫在標簽內部--><property name='number'> <value>1</value></property><property name='name' value='wyh'/><property name='school' value='hngy'/> </bean></beans>
寫一個測試類
public class Test { /** * 通過 ClassPathXmlApplicationContext 獲取 Spring 應用程序的 上下文 ApplicationContext */ @org.junit.Test public void test(){ApplicationContext applicationContext = new ClassPathXmlApplicationContext('beans.xml');// 第一種方式 獲取ioc 容器中的Student 強制類型轉換Student student = (Student) applicationContext.getBean('student');// 第二種方式 直接在后面寫明類的標簽。Student student1 = applicationContext.getBean('student', Student.class);// student.setName('cccc'); 給其中一個修改 就會全部修改 可以自己打開測試下 System.out.println(student);System.out.println(student1);// 這里結果為true // 解釋:因為Spring 默認構造出來的對象 默認是單例的。 無論獲取多少次 ,都是單例的。System.out.println(student==student1); }/** * 通過 FileSystemXmlApplicationContext 獲取 Spring 應用程序的 上下文 ApplicationContext * 還有第三種是 通過Web服務器實例化 ApplicationContext 容器 */ @org.junit.Test public void test2(){//這里的路徑 也可以 用絕對路徑ApplicationContext applicationContext = new FileSystemXmlApplicationContext('srcmainresourcesbeans.xml');Student student = applicationContext.getBean('student', Student.class);System.out.println(student); }}
小小思考
為什么 new ClassPathXmlApplicationContext(“beans.xml”); 要用ApplicationContext 來接收,而不用ClassPathXmlApplicationContext 接收呢?
ApplicationContext applicationContext = new ClassPathXmlApplicationContext('beans.xml');
ClassPathXmlApplicationContext applicationContext = new ClassPathXmlApplicationContext('beans.xml');
解釋:
按照面向接口編程的思想,聲明變量應該是接口類型的,然后創建一個該接口的實現類的實例賦值給該變量。 ApplicationContext是接口,ClassPathXmlApplicationContext是它的一個實現類。所以你就看到了 ApplicationContext ac = new ClassPathXmlApplicationContext(…)
總結本篇文章就到這里了,希望能給你帶來幫助,也希望您能夠多多關注好吧啦網的更多內容!
相關文章:
1. 解決Android Studio 格式化 Format代碼快捷鍵問題2. JavaEE SpringMyBatis是什么? 它和Hibernate的區別及如何配置MyBatis3. SpringBoot+TestNG單元測試的實現4. Python使用urlretrieve實現直接遠程下載圖片的示例代碼5. 完美解決vue 中多個echarts圖表自適應的問題6. vue實現web在線聊天功能7. Springboot 全局日期格式化處理的實現8. JavaScript實現頁面動態驗證碼的實現示例9. php解決注冊并發問題并提高QPS10. Java使用Tesseract-Ocr識別數字

 網公網安備
網公網安備