Spring boot集成Go-FastDFS實現圖片上傳刪除等功能實現
一.背景
工作中接觸到需要采集并管理大量圖片的需求,本來是用的FastDFS,但是發現實際情況是在項目實施時難以找到linux服務器去安裝FastDFS,所以經過調研,選擇了可以在windows服務器上安裝部署的Go-FastDFS文件服務器
二.Go-FastDFS簡介
go-fastdfs是一個基于http協議的分布式文件系統,它基于大道至簡的設計理念,一切從簡設計,使得它的運維及擴展變得更加簡單,它具有高性能、高可靠、無中心、免維護等優點。
三.安裝Go-FastDFS文件服務器
1)下載地址:https://github.com/sjqzhang/go-fastdfs/releases
2)下載完成直接啟動fileserver.exe
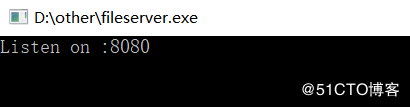
3)驗證是否安裝成功,訪問localhost:8080
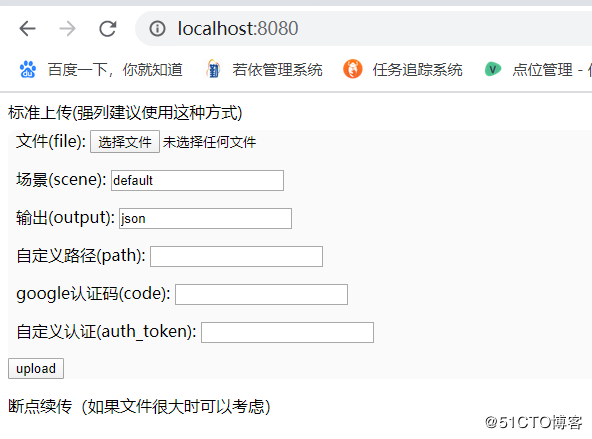
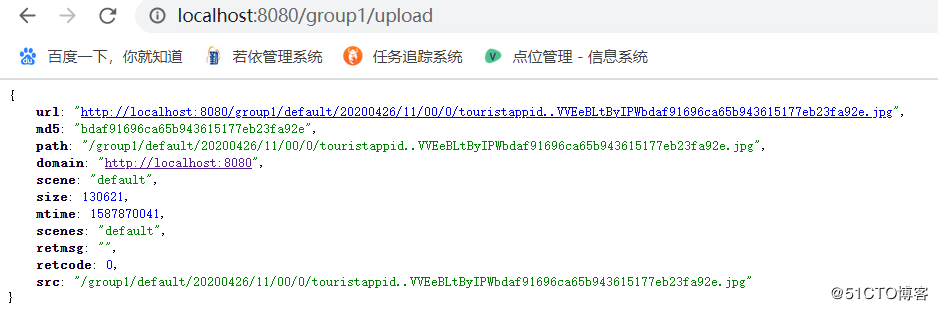
4)驗證上傳功能,點擊選擇文件選擇好文件后,點擊上傳
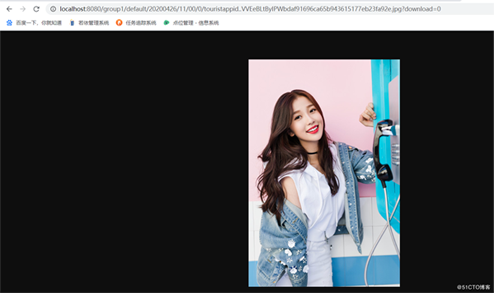
5)在返回的url后加?download=0,查看圖片
四.實例實現功能
1)圖片上傳2)圖片刪除3)圖片訪問4)圖片水印添加
五.創建Spring boot項目,寫代碼實現功能
1)pom.xml添加依賴
<!--工具包--> <dependency> <groupId>cn.hutool</groupId> <artifactId>hutool-all</artifactId> <version>${hutool.version}</version> </dependency>
2)核心代碼,使用go-fastdhs上傳圖片并添加水印及刪除圖片工具類
@Componentpublic class GoFastdfsClientUtil { @Value('${camera.upload.path}') private String uploadPath; @Value('${camera.delete.path}') private String deletePath; private final Logger logger = LoggerFactory.getLogger(GoFastdfsClientUtil.class); /** * 圖片上傳 * * @param file * @param sixCode * @return * @throws IOException */ public UploadResult upload(MultipartFile file, String sixCode) throws IOException { UploadResult uploadResult = new UploadResult(); ByteArrayOutputStream bos = addWatermark(file, sixCode); byte[] b = bos.toByteArray(); ByteArrayInputStream byteArrayInputStream = new ByteArrayInputStream(b); InputStreamResource isr = new InputStreamResource(byteArrayInputStream, file.getOriginalFilename()); Map<String, Object> params = new HashMap<>(); params.put('file', isr); params.put('path', 'image'); params.put('output', 'json'); // 場景 params.put('scene', 'image'); String resp = HttpUtil.post(uploadPath, params); Console.log('resp: {}', resp); JSONObject exJson = JSONObject.parseObject(resp); uploadResult = JSON.toJavaObject(exJson, UploadResult.class); return uploadResult; } /** * 圖片刪除 * * @param fileUrl */ public void deleteImage(String md5) { if (StringUtils.isEmpty(md5)) { return; } try { Map<String, Object> params = new HashMap<>(); params.put('md5', md5); HttpUtil.post(deletePath, params); } catch (Exception e) { logger.warn(e.getMessage()); } } /** * 加水印 * * @param myfile * @param sixCode * @return * @throws IOException */ private ByteArrayOutputStream addWatermark(MultipartFile myfile, String sixCode) throws IOException { InputStream in = myfile.getInputStream(); BufferedInputStream bis = new BufferedInputStream(in); BufferedImage image = ImageIO.read(bis); int height = image.getHeight(); int width = image.getWidth(); // 加水印 Graphics2D g = image.createGraphics(); g.drawImage(image, 0, 0, width, height, null); g.setColor(new Color(128, 128, 128)); // 字體 int num = 0; if (width > height) { num = height / 30; } else { num = width / 30; } g.setFont(new Font('微軟雅黑', Font.PLAIN, num)); SimpleDateFormat formatter = new SimpleDateFormat('yyyy-MM-dd HH:mm:ss'); String date = formatter.format(new Date()); String watermarkContent = '拍攝時間:' + date + '&攝像頭編碼:' + sixCode; // 設置水印坐標 String[] split = watermarkContent.split('&'); int x = 10; int y = height - 10; for (int i = 0; i < split.length; i++) { g.drawString(split[i], x, y -= g.getFontMetrics().getHeight()); } g.dispose(); ByteArrayOutputStream bos = new ByteArrayOutputStream(); ImageIO.write(image, 'jpg', bos); return bos; }}
解釋:這里我們事先在配置文件中配置好了文件的上傳路徑以及刪除路徑,配置如下:
camera: upload: path: http://localhost:8080/group1/upload delete: path: http://localhost:8080/group1/delete visit: path: http://localhost:8080
3)上面的方法中我們將圖片上傳后的返回值轉換為結果集對象,對象定義如下:
public class UploadResult implements Serializable{/** * */private static final long serialVersionUID = 5534287808864118463L;private String url;private String md5;private String path;private String domain;private String scene;private BigInteger size;private BigInteger mtime;private String scenes;private String retmsg;private int retcode;private String src;......get,set方法.....}
4)在實際應用中編寫控制層方法調用核心工具類的上傳,刪除方法即可
總結:本次總結主要描述了spring boot集成go-fastdfs上傳圖片的核心方法,沒有具體的測試展示,其實go-fastdfs的使用很簡單,接口編寫也很簡單
到此這篇關于Spring boot集成Go-FastDFS實現圖片上傳刪除等功能實現的文章就介紹到這了,更多相關Spring boot集成Go-FastDFS圖片上傳刪除內容請搜索好吧啦網以前的文章或繼續瀏覽下面的相關文章希望大家以后多多支持好吧啦網!
相關文章:

 網公網安備
網公網安備