Vue+Element自定義縱向表格表頭教程
如下所示:
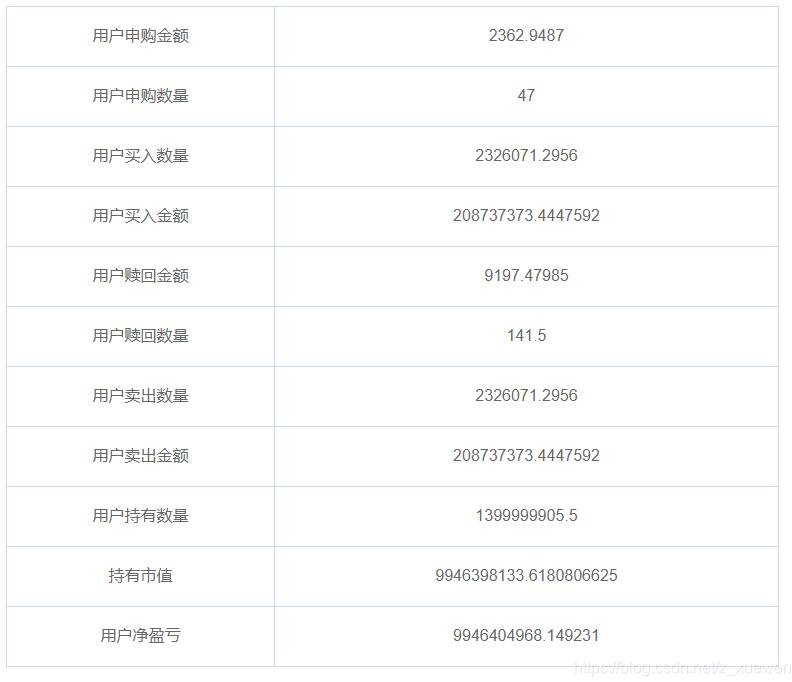
代碼如下:
<table class='myTable'> <tr v-for='(item,i) in statDatas' :key='i'> <td class='column'>{{ item.key }}</td> <td class='column'>{{ item.value }}</td> </tr></table>
綁定的是 statDatas 屬性是一個 json數組,由key value組成的json,如果需要多列就直接增加屬性就可以。
優美樣式:
.myTable { border-collapse: collapse; margin: 0 auto; text-align: center;} .myTable td,.myTable th { border: 1px solid #cad9ea; color: #666; height: 60px;}
補充知識:vue element table表頭垂直表格(新增封裝一個垂直表格的組件)
對話框中彈出查看信息,打開時表格,要求是表頭在左側
<table :model='editForm' id='printTest'> <thead></thead> <tbody> <tr> <td>日報類型</td> <td>{{editForm.daily_type | filterType}}</td> </tr> <tr> <td>開始時間</td> <td>{{editForm.start_time | formatTimer(’hours’)}}</td> </tr> <tr> <td>結束時間</td> <td>{{editForm.end_time | formatTimer(’hours’) }}</td> </tr> <tr> <td>今日內容</td> <td>{{editForm.content}}</td> </tr> <tr> <td>計劃</td> <td>{{editForm.plan}}</td> </tr> </tbody> </table>
效果

------------------手動的華麗麗的的分割線------------------
最近封裝了一個帶插槽的垂直表頭的table組件
效果如圖

封裝的部分全部代碼
<template> <div class='table_detail'> <div v-for='item in detailData' :key='item.value'> <div class='label'> <el-badge :value='1' type='primary' v-if='item.label === ’扣分項’ || item.label === ’加分項’' //這里是動態傳表頭進去 /> {{ item.label }} </div> <div class='text'> <template v-if='$scopedSlots[item.prop]'> <slot :name='item.prop' :files='item.text'></slot> </template> <template v-else>{{ item.text }}</template> </div> </div> </div></template><script>export default { name: 'table-detail', props: { detailData: { type: Array, default: () => [] } }, data() { return { visible: false } }}</script><style lang='scss'>.table_detail { width: auto; height: auto; margin: 0 10px 0 10px; border: 1px solid #ebeef5; border-bottom: none; .list { display: flex; justify-content: space-between; border-bottom: 1px solid #ebeef5; // font-size: 16px; .label { width: 95px; border-right: 1px solid #ebeef5; padding: 10px 10px 10px 0; text-align: right; font-weight: 400; } .text { flex: 1; text-align: left; padding: 10px 30px 10px 10px; font-weight: 500; word-wrap: break-word; //超出文本行自動換行 word-break: break-all; //超出文本行自動換行 overflow: hidden; //超出文本行自動換行 } }}</style>
然后使用部分,先局內引入注冊
然后使用
<table-detail :detailData='companyDetail'> // 這部分使我們自己要用的預覽文件的部分,不用的話可以不用寫 <template v-slot:file='{ files }'> <app-upload :upload='new Upload(upload)' is-download is-preview is-view disabled /> <ul> <li v-for='(file, i) in files' :key='i'> {{ file.url }} <el-link type='primary' :href='http://www.cgvv.com.cn/bcjs/file ? file.url : ’’' target='_blank' >預覽</el-link > <el-link type='primary' @click='download(file)'>下載</el-link> </li> </ul> </template> </table-detail>
在data 里面定義 companyDetail: [],
然后在methods里面獲取到數據之后賦值即可
this.companyDetail = [ { label: `${this.labelTitle}項`, text: res.indexTitle }, { label: `${this.labelTitle}值`, text: res.score }, { label: `${this.labelTitle}時間`, text: this.$formatDate(res.reportTime, 'YYYY.MM.DD', 'YYYYMMDD') }, { label: `${this.labelTitle}單位`, text: res.orgName }, { label: `${this.labelTitle}原因`, text: res.description }, { label: '申訴理由', text: res.reason }, { label: '附件', prop: 'file', text: files } ]
大致如上。
以上這篇Vue+Element自定義縱向表格表頭教程就是小編分享給大家的全部內容了,希望能給大家一個參考,也希望大家多多支持好吧啦網。
相關文章:
 網公網安備
網公網安備