徹底搞懂Java多線程(一)
1.繼承Thread
2.實現Runnable
3.實現Callable
使用繼承Thread類來開發多線程的應用程序在設計上是有局限性的,因為Java是單繼承。
繼承Thread類
public class ThreadDemo1 { // 繼承Thread類 寫法1 static class MyThread extends Thread{@Overridepublic void run() { //要實現的業務代碼} } // 寫法2 Thread thread = new Thread(){@Overridepublic void run() { //要實現的業務代碼} };}
實現Runnable接口
//實現Runnable接口 寫法1class MyRunnable implements Runnable{ @Override public void run() {//要實現的業務代碼 }}//實現Runnable接口 寫法2 匿名內部類class MyRunnable2 { public static void main(String[] args) {Thread thread = new Thread(new Runnable() { @Override public void run() {//要實現的業務代碼 }}); }}
實現Callable接口(Callable + FutureTask 創建帶有返回值的線程)
package ThreadDeom;import java.util.concurrent.Callable;import java.util.concurrent.ExecutionException;import java.util.concurrent.FutureTask;/** * user:ypc; * date:2021-06-11; * time: 17:34; *///創建有返回值的線程 Callable + Futurepublic class ThreadDemo2 { static class MyCallable implements Callable<Integer>{@Overridepublic Integer call() throws Exception { return 0;} } public static void main(String[] args) throws ExecutionException, InterruptedException {//創建Callable子對象MyCallable myCallable = new MyCallable();//使用FutureTask 接受 CallableFutureTask<Integer> futureTask = new FutureTask<>(myCallable);//創建線程并設置任務Thread thread = new Thread(futureTask);//啟動線程thread.start();//得到線程的執行結果int num = futureTask.get(); }}
也可以使用lambda表達式
class ThreadDemo21{ //lambda表達式 Thread thread = new Thread(()-> {//要實現的業務代碼 });}
Thread的構造方法
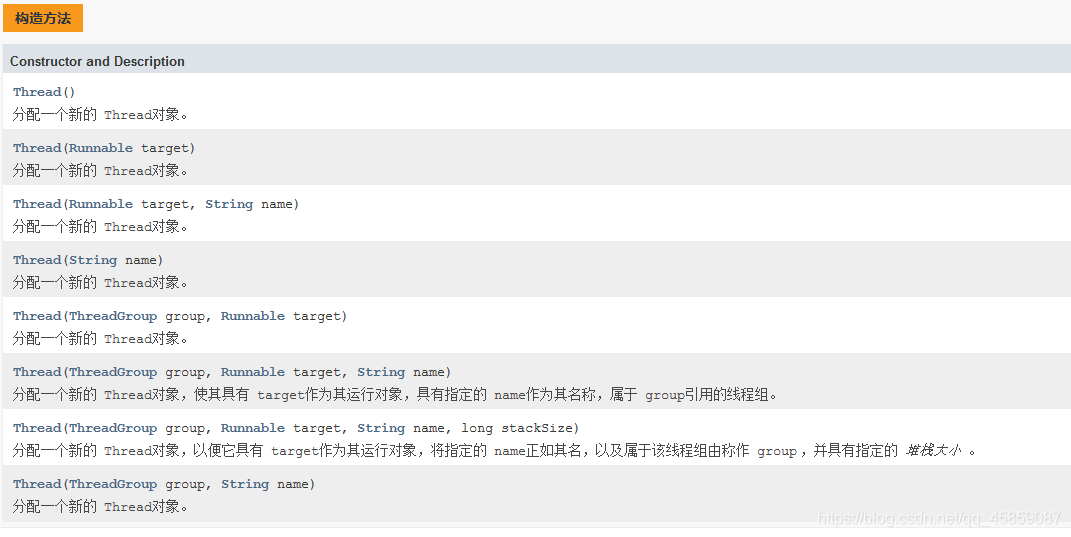
獲取當前線程的引用、線程的休眠
class Main{ public static void main(String[] args) throws InterruptedException {Thread.sleep(1000);//休眠1000毫秒之后打印System.out.println(Thread.currentThread());System.out.println(Thread.currentThread().getName()); }}

package ThreadDeom;/** * user:ypc; * date:2021-06-11; * time: 18:38; */public class ThreadDemo6 { public static void main(String[] args) throws InterruptedException {Thread thread = new Thread(new Runnable() { @Override public void run() {System.out.println('線程的ID:' + Thread.currentThread().getId());System.out.println('線程的名稱:' + Thread.currentThread().getName());System.out.println('線程的狀態:' + Thread.currentThread().getState());try { Thread.sleep(1000);} catch (InterruptedException e) { e.printStackTrace();} }},'線程一');thread.start();Thread.sleep(100);//打印線程的狀態System.out.println('線程的狀態:'+thread.getState());System.out.println('線程的優先級:'+thread.getPriority());System.out.println('線程是否存活:'+thread.isAlive());System.out.println('線程是否是守護線程:'+thread.isDaemon());System.out.println('線程是否被打斷:'+thread.isInterrupted()); }}
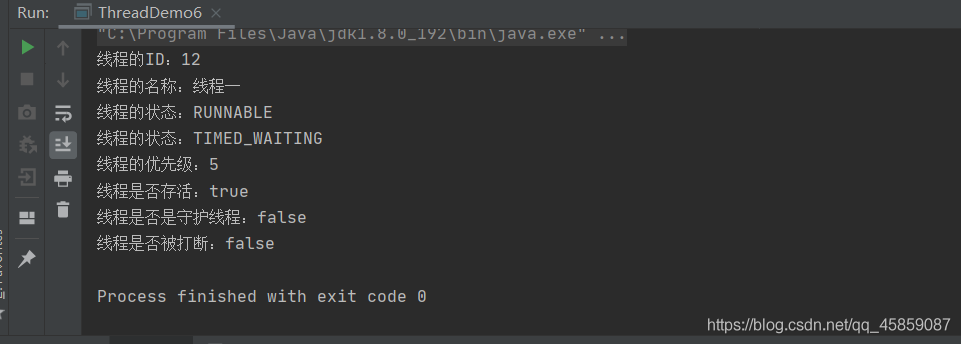
線程的等待
假設有一個坑位,thread1 和 thread2 都要上廁所。一次只能一個人上,thread2只能等待thread1使用完才能使用廁所。就可以使用join()方法,等待線程1執行完,thread2在去執行。👇
package ThreadDeom;/** * user:ypc; * date:2021-06-12; * time: 10:48; */public class ThreadDemo13 { public static void main(String[] args) throws InterruptedException {Runnable runnable = new Runnable() { @Override public void run() {System.out.println(Thread.currentThread().getName()+'🚾');try { Thread.sleep(1000);} catch (InterruptedException e) { e.printStackTrace();}System.out.println(Thread.currentThread().getName()+'出來了'); }};Thread t1 = new Thread(runnable,'thread1');t1.start();//t1.join();Thread t2 = new Thread(runnable,'thread2');t2.start(); }}
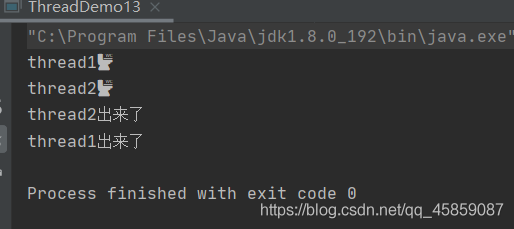
沒有join()顯然是不行的。加上join()之后:

package ThreadDeom;/** * user:ypc; * date:2021-06-12; * time: 9:59; */public class ThreadDemo11 { private static boolean flag = false; public static void main(String[] args) throws InterruptedException {Thread thread = new Thread(new Runnable() { @Override public void run() {while (!flag){ System.out.println('我是 : ' + Thread.currentThread().getName() + ',我還沒有被interrupted呢'); try {Thread.sleep(100); } catch (InterruptedException e) {e.printStackTrace(); }}System.out.println('我是 '+Thread.currentThread().getName()+',我被interrupted了'); }},'thread');thread.start();Thread.sleep(300);flag = true; }}

package ThreadDeom;/** * user:ypc; * date:2021-06-12; * time: 9:59; */public class ThreadDemo11 {// private static boolean flag = false; public static void main(String[] args) throws InterruptedException {Thread thread = new Thread(new Runnable() { @Override public void run() {while (!Thread.interrupted()){ System.out.println('我是 : ' + Thread.currentThread().getName() + ',我還沒有被interrupted呢'); try {Thread.sleep(100); } catch (InterruptedException e) {//e.printStackTrace();break; }}System.out.println('我是 '+Thread.currentThread().getName()+',我被interrupted了'); }},'thread');thread.start();Thread.sleep(300);thread.interrupt();//flag = true; }}
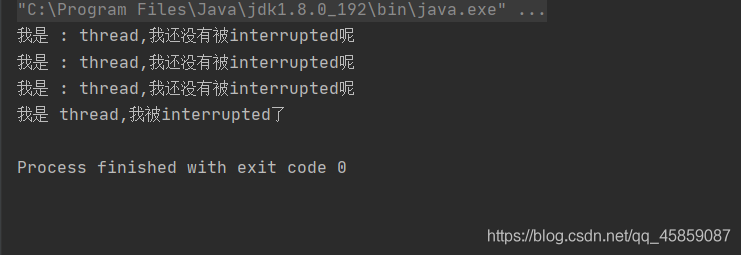
Thread.interrupted()方法第一次接收到終止的狀態后,之后會將狀態復位,Thread.interrupted()是靜態的,是全局的。
Threaed.currentThread().interrupt()只是普通的方法。
Thraed.interrupted()方法
package ThreadDeom;/** * user:ypc; * date:2021-06-12; * time: 10:32; */public class ThreadDemo12 { public static void main(String[] args) throws InterruptedException {Thread thread = new Thread(() ->{ for (int i = 0; i < 10; i++) {System.out.println(Thread.interrupted()); }});thread.start();thread.interrupt(); }}
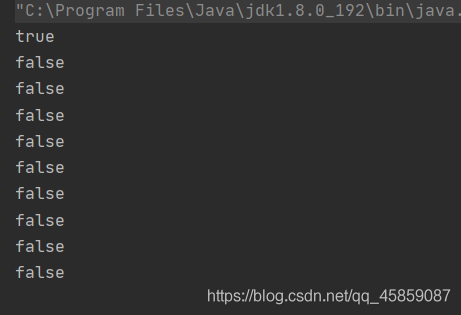
Threaed.currentThread().interrupt()
package ThreadDeom;/** * user:ypc; * date:2021-06-12; * time: 10:32; */public class ThreadDemo12 { public static void main(String[] args) throws InterruptedException {Thread thread = new Thread(() ->{ for (int i = 0; i < 10; i++) {//System.out.println(Thread.interrupted());System.out.println(Thread.currentThread().isInterrupted()); }});thread.start();thread.interrupt(); }}

yield()方法
讓出CPU的執行權
package ThreadDeom;/** * user:ypc; * date:2021-06-12; * time: 11:47; */public class ThreadDemo15 { public static void main(String[] args) {Thread thread1 = new Thread(() -> { for (int i = 0; i < 100; i++) {Thread.yield();System.out.println('thread1'); }});thread1.start();Thread thread2 = new Thread(() -> { for (int i = 0; i < 100; i++) {System.out.println('thread2'); }});thread2.start(); }}
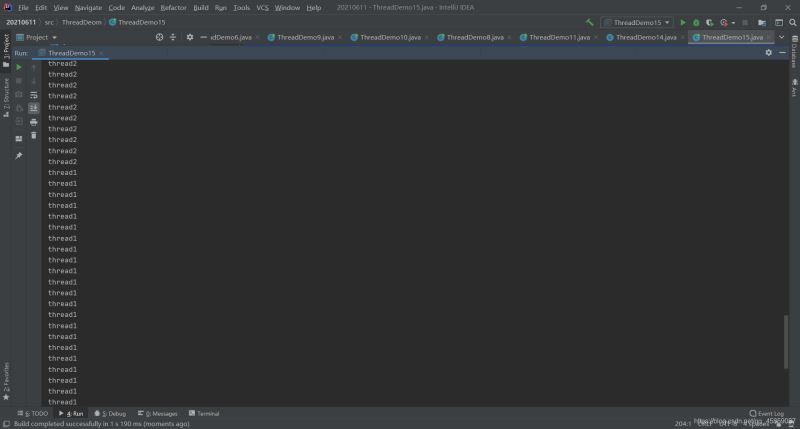
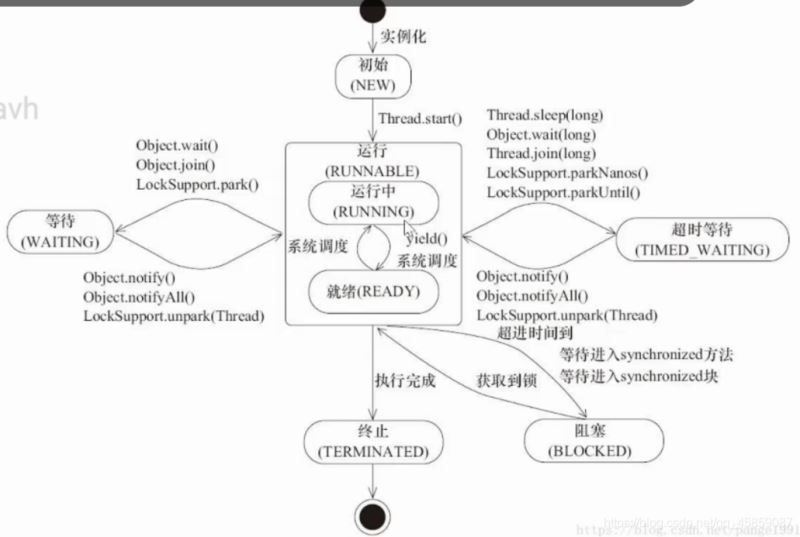
打印出線程的所有的狀態,所有的線程的狀態都在枚舉中。👇
package ThreadDeom;/** * user:ypc; * date:2021-06-12; * time: 11:06; */public class ThreadDemo14 { public static void main(String[] args) {for (Thread.State state: Thread.State.values()) { System.out.println(state);} }}

package ThreadDeom;/** * user:ypc; * date:2021-06-12; * time: 11:06; */class TestThreadDemo{ public static void main(String[] args) throws InterruptedException {Thread thread = new Thread(new Runnable() { @Override public void run() {try { Thread.sleep(2000);} catch (InterruptedException e) { e.printStackTrace();} }});System.out.println(thread.getState());thread.start();System.out.println(thread.getState());Thread.sleep(100);System.out.println(thread.getState());thread.join();System.out.println(thread.getState()); }}
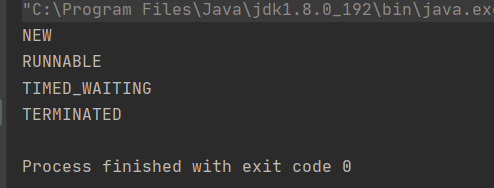
在Java中線程 的優先級分為1 ~ 10 一共十個等級
package ThreadDeom;/** * user:ypc; * date:2021-06-11; * time: 21:22; */public class ThreadDemo9 { public static void main(String[] args) {for (int i = 0; i < 5; i++) { Thread t1 = new Thread(new Runnable() {@Overridepublic void run() { System.out.println('t1');} }); //最大優先級 t1.setPriority(10); t1.start(); Thread t2 = new Thread(new Runnable() {@Overridepublic void run() { System.out.println('t2');} }); //最小優先級 t2.setPriority(1); t2.start(); Thread t3 = new Thread(new Runnable() {@Overridepublic void run() { System.out.println('t3');} }); t3.setPriority(1); t3.start();} }}
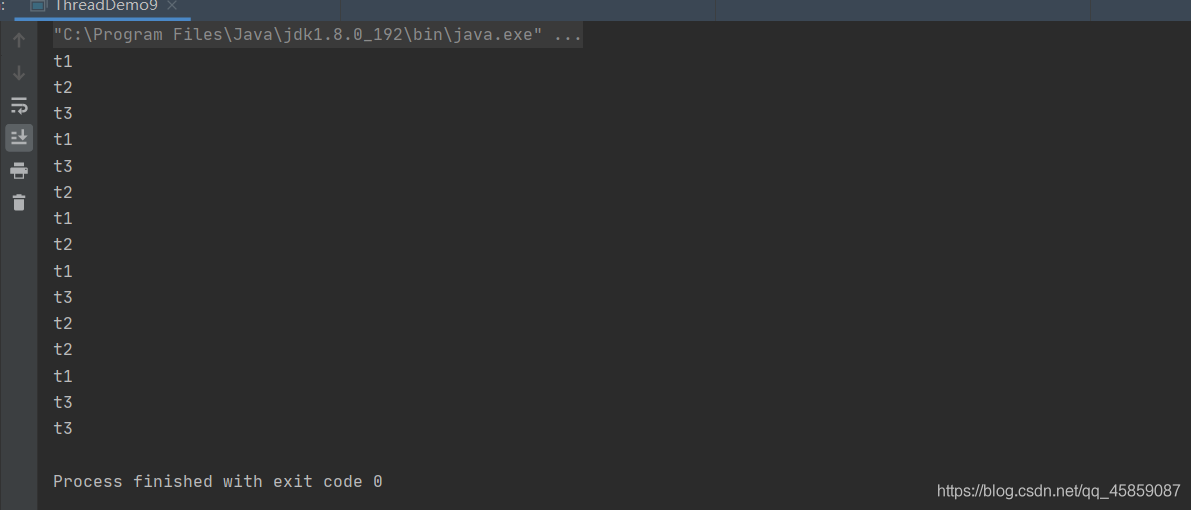
線程的優先級不是絕對的,只是給程序的建議。
線程之間的優先級具有繼承的特性,如果A線程啟動了B線程,那么B的線程的優先級與A是一樣的。👇
package ThreadDeom;/** * user:ypc; * date:2021-06-11; * time: 20:46; */class ThreadA extends Thread{ @Override public void run() {System.out.println('ThreadA優先級是:' + this.getPriority());ThreadB threadB = new ThreadB();threadB.start(); }}class ThreadB extends ThreadA{ @Override public void run() {System.out.println('ThreadB的優先級是:' + this.getPriority()); }}public class ThreadDemo7 { public static void main(String[] args) {System.out.println('main線程開始的優先級是:' + Thread.currentThread().getPriority()); System.out.println('main線程結束的優先級是:' + Thread.currentThread().getPriority());ThreadA threadA = new ThreadA();threadA.start(); }}
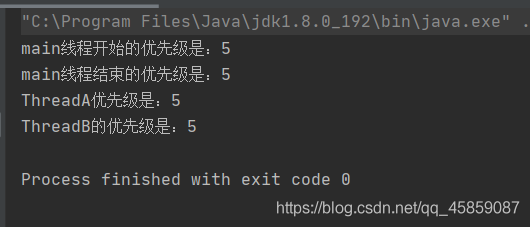
再看👇
package ThreadDeom;/** * user:ypc; * date:2021-06-11; * time: 20:46; */class ThreadA extends Thread{ @Override public void run() {System.out.println('ThreadA優先級是:' + this.getPriority());ThreadB threadB = new ThreadB();threadB.start(); }}class ThreadB extends ThreadA{ @Override public void run() {System.out.println('ThreadB的優先級是:' + this.getPriority()); }}public class ThreadDemo7 { public static void main(String[] args) {System.out.println('main線程開始的優先級是:' + Thread.currentThread().getPriority());Thread.currentThread().setPriority(9);System.out.println('main線程結束的優先級是:' + Thread.currentThread().getPriority());ThreadA threadA = new ThreadA();threadA.start(); }}
結果為👇
 守護線程
守護線程Java中有兩種線程:一種是用戶線程,一種就是守護線程。
什么是守護線程?守護線程是一種特殊的線程,當進程中不存在用戶線程的時候,守護線程就會自動銷毀。典型的守護線程就是垃圾回收線程,當進程中沒有了非守護線程,則垃圾回收線程也就沒有存在的必要了。
Daemon線程的作用就是為其他線程的運行提供便利的。👇
package ThreadDeom;/** * user:ypc; * date:2021-06-11; * time: 21:06; */public class ThreadDemo8 { static private int i = 0; public static void main(String[] args) throws InterruptedException {Thread thread = new Thread(new Runnable() { @Override public void run() {while (true){ i++; System.out.println(i); try {Thread.sleep(1000); } catch (InterruptedException e) {e.printStackTrace(); }} }});//設置守護線程thread.setDaemon(true);thread.start();Thread.sleep(5000);System.out.println('我是守護線程thread 當用戶線程執行完成后 我也就銷毀了😭哭了'); }}

注意:守護線程的設置必須放在start()之前,否則就會報錯。
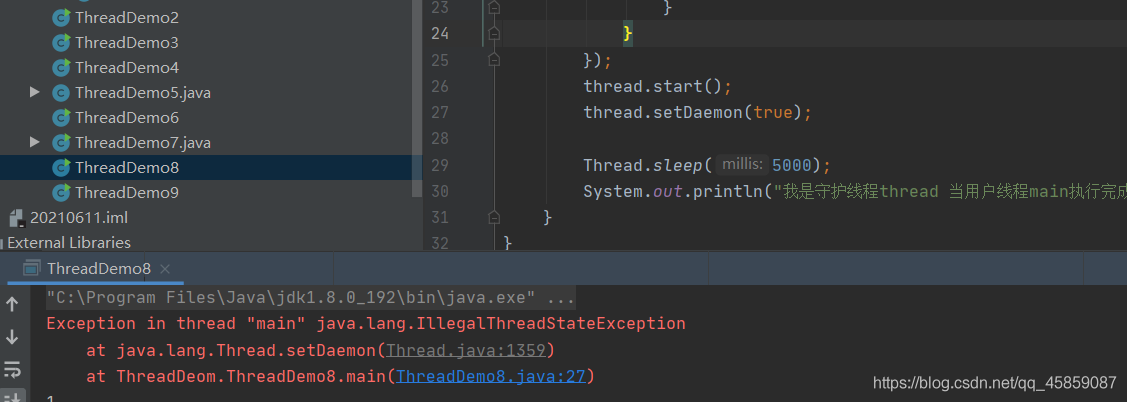
在守護線程中創建的線程默認也是守護線程。
package ThreadDeom;/** * user:ypc; * date:2021-06-12; * time: 9:35; */public class ThreadDemo10 { public static void main(String[] args) {Thread thread1 = new Thread(()->{ Thread thread2 = new Thread(() -> { },'thread2'); System.out.println('thread2是守護線程嗎?:' + thread2.isDaemon());},'thread1');System.out.println('thread1是守護線程嗎?:' + thread1.isDaemon());//thread1.setDaemon(true);thread1.start(); // System.out.println('thread1是守護線程嗎?:' + thread1.isDaemon()); }}

再看👇
package ThreadDeom;/** * user:ypc; * date:2021-06-12; * time: 9:35; */public class ThreadDemo10 { public static void main(String[] args) {Thread thread1 = new Thread(()->{ Thread thread2 = new Thread(() -> { },'thread2'); System.out.println('thread2是守護線程嗎?:' + thread2.isDaemon());},'thread1');System.out.println('thread1是守護線程嗎?:' + thread1.isDaemon());thread1.setDaemon(true);thread1.start();System.out.println('thread1是守護線程嗎?:' + thread1.isDaemon()); }}

為了便于對某些具有相同功能的線程進行管理,可以把這些線程歸屬到同一個線程組中,線程組中既可以有線程對象,也可以有線程組,組中也可以有線程。使用線程模擬賽跑
public class ThreadDemo5 { //線程模擬賽跑(未使用線程分組) public static void main(String[] args) {Thread t1 = new Thread(new Runnable() { @Override public void run() {try { Thread.sleep(1000);} catch (InterruptedException e) { e.printStackTrace();}System.out.println(Thread.currentThread().getName() + '到達了終點'); }}, '選手一');Thread t2 = new Thread(new Runnable() { @Override public void run() {try { Thread.sleep(1200);} catch (InterruptedException e) { e.printStackTrace();}System.out.println(Thread.currentThread().getName() + '到達了終點'); }}, '選手二');t1.start();t2.start();System.out.println('所有選手到達了終點'); }}
運行結果:

不符合預期效果,就可以使用線程組來實現
package ThreadDeom;/** * user:ypc; * date:2021-06-11; * time: 18:24; */class ThreadGroup1 { //線程分組模擬賽跑 public static void main(String[] args) {ThreadGroup threadGroup = new ThreadGroup('Group');Thread t1 = new Thread(threadGroup, new Runnable() { @Override public void run() {try { Thread.sleep(1000);} catch (InterruptedException e) { e.printStackTrace();}System.out.println('選手一到達了終點'); }});Thread t2 = new Thread(threadGroup, new Runnable() { @Override public void run() {try { Thread.sleep(1200);} catch (InterruptedException e) { e.printStackTrace();}System.out.println('選手二到達了終點'); }});t2.start();t1.start();while (threadGroup.activeCount() != 0) {}System.out.println('所有選手到達了終點'); }}

線程組常用的方法
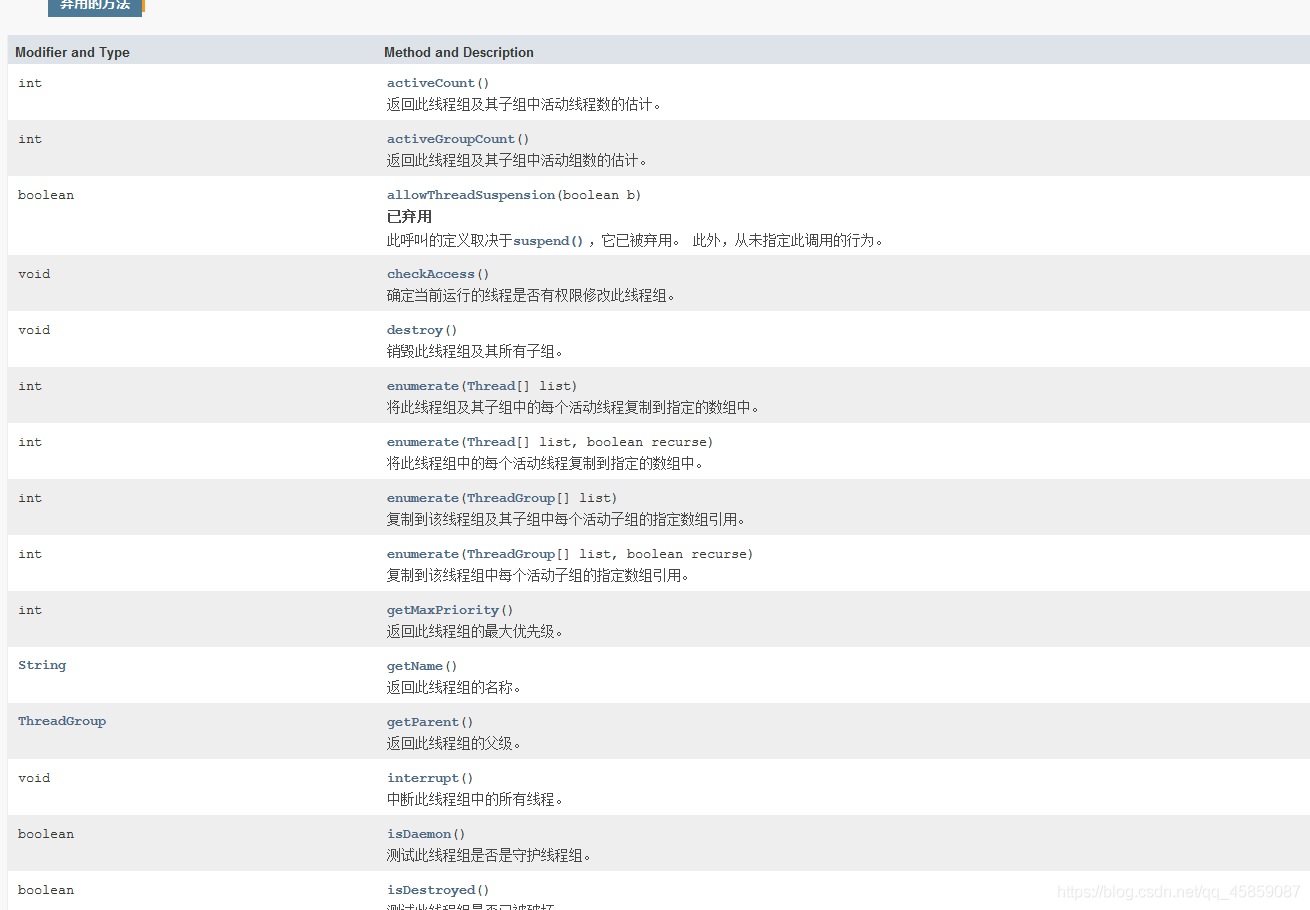
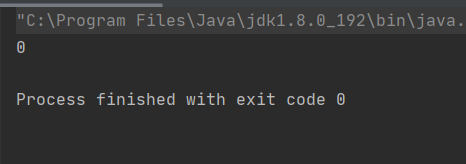
來看單線程情況下讓count分別自增和自減10000次
package ThreadDeom;/** * user:ypc; * date:2021-06-12; * time: 12:03; */class Counter { private static int count = 0; public void increase(){for (int i = 0; i < 10000; i++) { count++;} } public void decrease(){for (int i = 0; i < 10000; i++) { count--;} } public int getCount(){return count; }}public class ThreadDemo16 { public static void main(String[] args) {//單線程Counter counter = new Counter();counter.increase();counter.decrease();System.out.println(counter.getCount()); }}
結果符合預期
如果想使程序的執行速度快,就可以使用多線程的方式來執行。在來看多線程情況下的問題
public class ThreadDemo16 { public static void main(String[] args) throws InterruptedException {//多線程情況下Counter counter = new Counter();Thread thread1 = new Thread(()->{ counter.decrease();});Thread thread2 = new Thread(()->{ counter.increase();});thread1.start();thread2.start();thread1.join();thread2.join();System.out.println(counter.getCount());/*//單線程Counter counter = new Counter();counter.increase();counter.decrease();System.out.println(counter.getCount()); */ }}
執行結果:

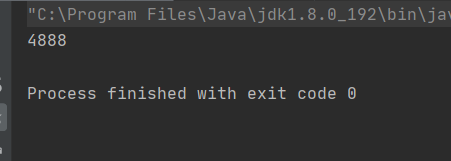
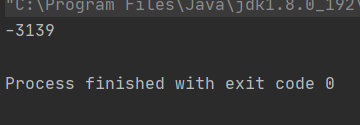
每次的執行結果是不一樣的。這就是多線程的不安全問題

預期的結果是0,但結果卻不是。線程不安全問題的原因:
1.CPU的搶占式執行 2.多個線程共同操作一個變量 3.內存可見性 4.原子性問題 5.編譯器優化(指令重排)多個線程操作同一個變量
如果多個線程操作的不是一個變量,就不會發生線程的不安全問題,可以將上面的代碼修改如下:👇
public class ThreadDemo16 { static int res1 = 0; static int res2 = 0; public static void main(String[] args) throws InterruptedException {Counter counter = new Counter();Thread thread1 = new Thread(new Runnable() { @Override public void run() {res1 = counter.getCount(); }});Thread thread2 = new Thread(new Runnable() { @Override public void run() {res2 = counter.getCount(); }});System.out.println(res1 + res2);/*//多線程情況下Counter counter = new Counter();Thread thread1 = new Thread(()->{ counter.decrease();});Thread thread2 = new Thread(()->{ counter.increase();});thread1.start();thread2.start();thread1.join();thread2.join();System.out.println(counter.getCount());*//*//單線程Counter counter = new Counter();counter.increase();counter.decrease();System.out.println(counter.getCount()); */ }}
這樣就可以了:

內存不可見問題:看下面的代碼,是不是到thread2執行的時候,就會改變num的值,從而終止了thread1呢?
package ThreadDeom;import java.util.Scanner;/** * user:ypc; * date:2021-06-12; * time: 13:03; */public class ThreadDemo17 { private static int num = 0; public static void main(String[] args) {Thread thread1 = new Thread(new Runnable() { @Override public void run() {while (num == 0){} }});thread1.start();Thread thread2 = new Thread(new Runnable() { @Override public void run() {Scanner scanner = new Scanner(System.in);System.out.println('輸入一個數字來終止線程thread1');num = scanner.nextInt(); }});thread2.start(); }}
結果是不能的:
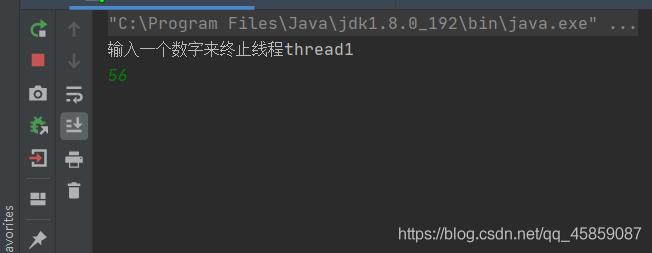
輸入一個數字后回車,并沒有讓thread1的循環結束。這就是內存不可見的問題。
原子性的問題
上面的++和?操作其實是分三步來執行的
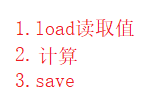
假設在第二部的時候,有另外一個線程也來修改值,那么就會出現臟數據的問題了。
所以就會發生線程的不安全問題
編譯器優化編譯器的優化會打亂原本程序的執行順序,就有可能導致線程的不安全問題發生。在單線程不會發生線程的不安全問題,在多線程就可能會不安全。
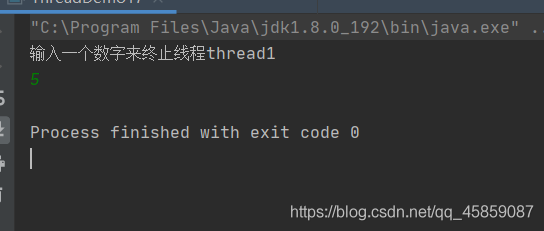
volatile關鍵字可以使用volatile關鍵字,這個關鍵字可以解決指令重排和內存不可見的問題。

加上volatile關鍵字之后的運行結果
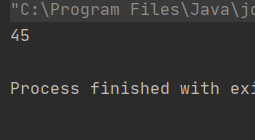
但是volatile關鍵字不能解決原子性的問題👇:
package ThreadDeom;/** * user:ypc; * date:2021-06-12; * time: 14:02; */class Counter1 { private static volatile int count = 0; public void increase() {for (int i = 0; i < 10000; i++) { count++;} } public void decrease() {for (int i = 0; i < 10000; i++) { count--;} } public int getCount() {return count; }}public class ThreadDemo18 { public static void main(String[] args) throws InterruptedException {Counter1 counter1 = new Counter1();Thread thread1 = new Thread(new Runnable() { @Override public void run() {counter1.decrease(); }});Thread thread2 = new Thread(() -> { counter1.increase();});thread1.start();thread2.start();thread1.join();thread2.join();System.out.println(counter1.getCount()); }}

本篇文章就到這里,希望可以幫到你,也希望您能夠多多關注好吧啦網的其他文章!
相關文章:

 網公網安備
網公網安備