Python切割圖片成九宮格的示例代碼
這篇文字講述如何使用Python把一張完整的大圖切割成9份小圖片,制作朋友圈九宮格圖文分享。
原圖如下:
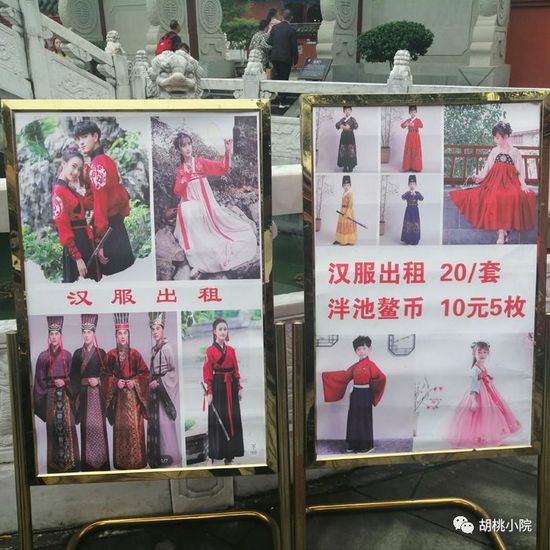
我們想要利用這張圖制作高逼格的九宮格朋友圈分享。
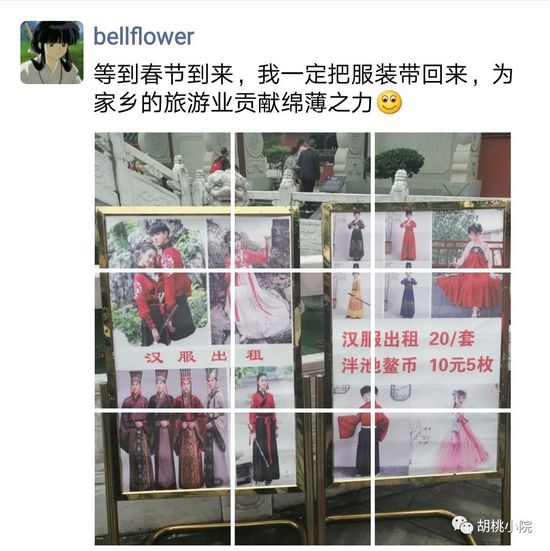
達到類似于這樣的效果:
實現原理非常簡單,那就是利用PIL庫對原圖不斷畫小區域然后切下來存儲成新的小圖片。
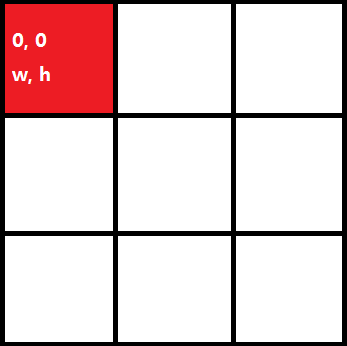
假設每一個格子的寬和高分別是w、h,那么第row行(從0開始計數),第col列(從0開始計數)的格子左上角坐標和右下角坐標分別是(col * w, row * h),(col * w + w, r * h + h)。
code snippet:#! /usr/local/bin/python3# -*- coding: utf-8 -*-fromPILimportImagedefcut_image(image):width, height = image.sizeitem_width = width /3.0item_height = height /3.0box_list = []forrowinrange(0,3):forcolinrange(0,3):box = (col * item_width, row * item_height,( col +1) * item_width,( row +1) * item_height)box_list.append( box )image_list = [image.crop(box)forboxinbox_list]returnimage_listdefsave_images(image_list):dirName =’output’ifFalse== os.path.exists( dirName ):os.makedirs( dirName )index =1forimageinimage_list:image.save(‘./output/python’+str(index) +’.png’,’PNG’)index +=1if__name__ ==’__main__’:image = Image.open('use.png')image_list = cut_image(image)save_images(image_list)
為了能在朋友圈中預覽時看到所有圖片的完整樣子,建議保證自己的原始圖片是正方形的,然后再運行這個腳本,在output中得到九張圖片。最后,嗯,就可以去秀了!
總結
到此這篇關于Python切割圖片成九宮格的文章就介紹到這了,更多相關Python切割圖片 九宮格 內容請搜索好吧啦網以前的文章或繼續瀏覽下面的相關文章希望大家以后多多支持好吧啦網!
相關文章:
 網公網安備
網公網安備