python3 通過 pybind11 使用Eigen加速代碼的步驟詳解
python是很容易上手的編程語言,但是有些時候使用python編寫的程序并不能保證其運行速度(例如:while 和 for),這個時候我們就需要借助c++等為我們的代碼提速。下面是我使用pybind11調用c++的Eigen庫的簡單介紹:
第一步:準備系統和IDE:
Windows 10 vs2015 (用于調試c++代碼) vscode (調試python代碼)第二步:python虛擬環境:
1.創建虛擬python虛擬環境: 在vscode的terminal中執行
python -m venv env
2.下載 Eigen : 將Eigen解壓到當前目錄命名為 eigen-3.3.8
3.在vscode的terminal中激活虛擬環境:
./env/Scripts/Activate.ps1
4.安裝pybind11:
pip install pybind11
安裝numpy==1.19.3(使用1.19.4可能會有問題) :
pip install numpy==1.19.3
第三步:使用vs2015編寫cpp_python.cpp, 并保證沒有bug
#include <Eigen/Dense>using namespace stdusing namespace EigenMatrixXd add_mat(MatrixXd A_mat, MatrixXd B_mat){ return A_mat + B_mat;}
第四步:使用pybind11為cpp_python.cpp添加python接口
// cpp_python.cpp : 此文件包含 'main' 函數。程序執行將在此處開始并結束。//#include <pybind11/pybind11.h>#include <pybind11/eigen.h>#include<pybind11/numpy.h>#include<fstream>#include<iostream>#include <Eigen/Dense>using namespace std;using namespace Eigen;MatrixXd add_mat(MatrixXd A_mat, MatrixXd B_mat){return A_mat + B_mat;}namespace py = pybind11;PYBIND11_MODULE(add_mat_moudle, m){m.doc() = 'Matrix add';//解釋說明m.def('mat_add_py'/*在pyhon中使用的函數名*/, &add_mat);}
第五步:設置setup.py用來編譯c++代碼
from setuptools import setupfrom setuptools import Extensionadd_mat_module = Extension(name=’add_mat_moudle’, # 模塊名稱 sources=[’cpp_python.cpp’], # 源碼 include_dirs=[r’.eigen-3.3.8’, r’.envScripts’, # 依賴的第三方庫的頭文件 r’.envLibsite-packagespybind11include’] )setup(ext_modules=[add_mat_module])
第六步:編譯測試
這是我當前的工作目錄
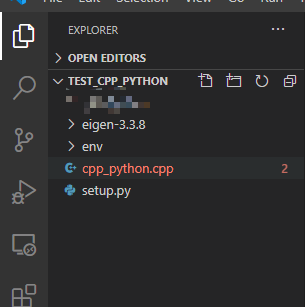
注意:我的cpp_python.cpp和setup.py是在同一個文件夾下。
執行: 'python .setup.py build_ext --inplace'就會得下面的結果,生成.pyd文件表明我們已經編譯成功。

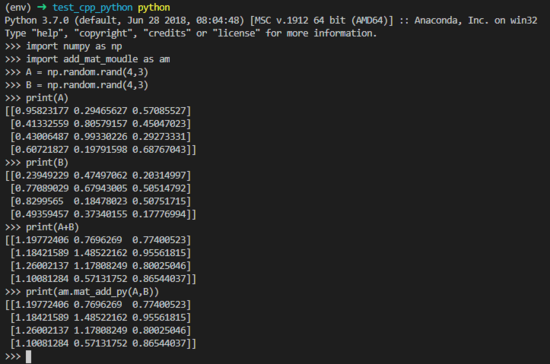
運行測試:
到此這篇關于python3 通過 pybind11 使用Eigen加速代碼的步驟詳解的文章就介紹到這了,更多相關python3 pybind11 Eigen加速代碼內容請搜索好吧啦網以前的文章或繼續瀏覽下面的相關文章希望大家以后多多支持好吧啦網!
相關文章:

 網公網安備
網公網安備